Create a Listing
To get started:
-
Sign in to your account to begin creating your listing.
Don't have an account? Sign up to create a property lister account.
- Select Add a Listing from the top menu.
- Under My Account, select Add a new Listing.
-
Follow the steps below to complete each section of your listing.
Incomplete sections will display red progress bars until all required fields are filled out:


Step 1: Enter Property Location
Find Your Address
Enter the exact rental property address and select the best option from the drop-down list:

Trouble Finding Your Address?
If you can't find your property's address in the drop-down options, or you receive an error, start by verifying that the address is correct and checking for errors. If the system still doesn't recognize your address, try alternative formats and spelling (e.g., "drive" instead of "dr", "Northwest Main Street" instead of "NW Main St", etc.).
You can also substitute a nearby address (such as an intersection or neighborhood entrance) until a recognized address is found. Then, drag the pin on the map to accurately reflect your property's location.
Need Help? For additional assistance with your property address or location, please reach out to customer support.
Step 2: Create Your Listing
Location
Map Marker Settings
If you do not want the exact location of your rental property to appear on the listing, uncheck the "Display exact property address on listing" option:

You will be able to move the map marker to a nearby location (e.g., the closest intersection or community leasing office) on the next page. This way, prospective renters will still be able to see your listing on the rental search map (or "Map View" for mobile users) without seeing its exact location.
If you do not want your listing to appear on the map at all, unselect "Include in map-based searches and place map on listing," and click Save & Continue.

Your property will still appear in the list to the right of the Rentals map (or in the "List View" on mobile), but it will not have a map marker.

Tip: We recommend including your listing in the map-based search to gain more interest in your property. Renters often lean on the map tool to filter their results by location. Location is key - especially for students!
Convenient For
Under Convenient For, select the type of tenant(s) you are would like to advertise your listing to:
- Undergraduates
- Graduate Students
- Faculty/Staff
Searchable Neighborhood
Select the area that best describes the location of your property from the Searchable Neighborhood down-down list. If you do not see your exact neighborhood, select the nearest available option.
Property Name/Headline
The Property Name/Headline will display on the rentals search page and at the top of the listing details page:

Tip: If the listing editor does not detect a unit description in your entry, it will automatically add "Rental" to the end of the Property Name/Headline. To avoid this, include a description of the type of unit you're listing in your Property Headline, such as "Rental," "Apartment," or "Bedroom for Rent" in your Title.
Once you've entered your property name, press Save & Continue.
Listing & Rent
- Enter the Building Type, the number of Bedrooms for rent & Bathrooms for rent, and Square Feet.
-
Enter the Total Rent, Rent Term, and Rent Type.
The Total Rent can be set to one fixed amount or to a range (e.g. $1,000 or $1,250-$1,500).
Tip: When selecting a Rental Type, choose "per Unit" if you are renting out an entire apartment or house with no other residents (including the landlord).
If you're seeking multiple renters for individual rooms within a single unit, list each bedroom separately and select "per Bedroom" as the Rental Type. For more information, refer to this guide to creating multiple listings.
- Select any relevant options from the list of Upfront Requirements (at least one is required).
- Enter your required Security Deposit amount. If the security deposit is contingent upon specific approval requirements, enter the Minimum Security Deposit and Maximum Security Deposit amounts. If you have one set price, leave the Maximum Security Deposit field blank.
- If applicable, enter any leasing/move-in Specials you are currently offering.
- Select Save & Continue.
Specifics
- Select the maximum number of occupants allowed in the unit or bedroom.
- If this property permits renters to sublet, you can select "This property allows subletting."
- If this is a sublet listing, select "Listing is for a sublet."
-
Under Listing is for, only select "An entire unit" if there are no other occupants within the unit and the entire apartment/house/condo is for lease. Select "A room in a unit" if you are listing a bedroom within a unit. This will tag the listing as "Shared Housing" on the Rentals search page:

- Under Availability, select "Now" if your unit is move-in ready, or specify the earliest date when it will be available.
- Select whether renters will have the option to renew at the end of their lease.
- Select Save & Continue.

Amenities & Details
Parking
- Choose the most suitable Parking Type option from the drop-down list, or select No Parking Available.
- If the tenant will have their own parking pace assigned to them, indicate the number of designated spots under Spaces. If parking is on a first-come, first-served basis, leave this field empty.
- Select +Save Parking Option.
- Scroll down to view the parking option you just saved, and create additional options if necessary.
Parking Options edit form:

Parking Options displayed on listing (what renters see):

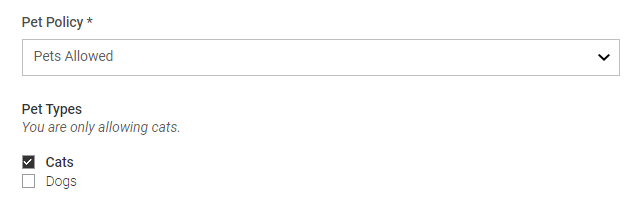
Pets
- Select Pets Allowed, Pets Considered, or Pets Not Allowed.
-
If applicable, select which pets are allowed or considered:

Amenities
- Select any amenities that apply to your listing.
- Under Utilities Included in Rent, only select Utilities that are included in the rate listed under the "Listing & Rent" tab.
- If you offer flexible lease term options, select "Flexible/Other lease" while also selecting each accepted option individually. This will allow your listing to appear under all applicable search filters.
Tip: Amenity selections impact the rental search filters under which your listing will appear, along with various details throughout your listing, so be sure to select all applicable amenities.
Description
Enter a detailed description of your property. Be sure to include your property's unique features, local amenities, and any details not already included in the amenities.
Contact
Verify the contact information where you'd like potential renters to reach you, and select your Preferred Contact Method.
Phone Number
Including a phone number is optional. If you do not want your phone number to display on the website, leave this field empty.
You can also enter office hours in the "Best Time to Call" field towards the bottom of the page.
Enter the email address(es) where you'd like to receive email leads. While you will receive leads at this address, the email address will not be displayed on your listing. Prospective renters will contact you through a contact form, and your email address will only be visible to them when you reply to the email lead.
By default, the email you used to register will be your Primary Email Address. You can edit your primary email as well as add additional email addresses under Account Settings > Email Addresses. For more information on email address settings, visit Adding Email Addresses to Your Account.
Photos & Media
- Upload your images by dragging them into the image field or clicking to select your uploads.
- You can upload a maximum of 6 photos per listing.
- Reorder your images by dragging them or click Reverse Order to flip the sequence of all images.
- Each photo requires a brief Description of up to 40 characters. This can be as short as one word and serves as a helpful tool to clarify the home's layout and label each space for the renter.
-
If you upload any floorplan images, change the Image Type to "Floorplan":

Your floorplan images will now appear in their own category on the listing.
- Select Save & Continue.
Photo Requirements
Image files should be in .jpg, .png, or .gif format and less than 8MB in size. We suggest using photos with a resolution of at least 630 x 420px.
Please note that all photos must adhere to content guidelines outlined in the Terms of Service. Non-compliant images, as well as images that contain more than one photograph (i.e., collages) or photos with superimposed text, are not permitted and will be removed without notice.
Tip: Quality images are key in crafting an effective listing. For helpful tips on photographing your rental property, check out this article from the Apartments.com Renterverse blog.
Step 3: Activate Your Listing
Once you have completed each section of the listing edit form, select Active from the dropdown in the top-left corner to turn on your listing:

Once you've submitted your listing, the listing's status will turn to Pending Approval while it is being reviewed by the University of California, Berkeley Cal Rentals Office.
Listings typically take 2 to 3 business days to be reviewed. Please keep in mind that holidays and weekend hours may affect the approval timeline. If any modifications are required, you will be contacted via e-mail. Please follow the instructions on the email on how to update your listing. Please note that once approved, it may take up to 2 hours before your listing appears on the website.
If denied
If your listing does not meet UC Berkeley's criteria and your listing is denied, you will be notified via email. For details on a denied listing, please refer to the contact information provided in the email.